A well-configured form lets a user not just to enter a phone number, but also customize the process of receiving text notifications according to his needs.
This element can include special fields for the choice of notification time, type of messages, info about the sending frequency, etc. Customized form can help you better understand the preferences of your client, increase customer loyalty to your SMS messages and brand in general.
That's why we have updated the functionality of the subscription form of Atomic Bulk SMS Sender with new features. Now, creating an item, you can give the person an option to select the desired date of receiving the text notifications.
The process of subscription form customization includes three main steps:
Let's suppose it's your first meet with the Atomic SMS. To start the work you should register for the service. It is necessary to create a Personal Account, where all the magic is.
To create the subscription form, in the Personal Account you should follow the next instruction:
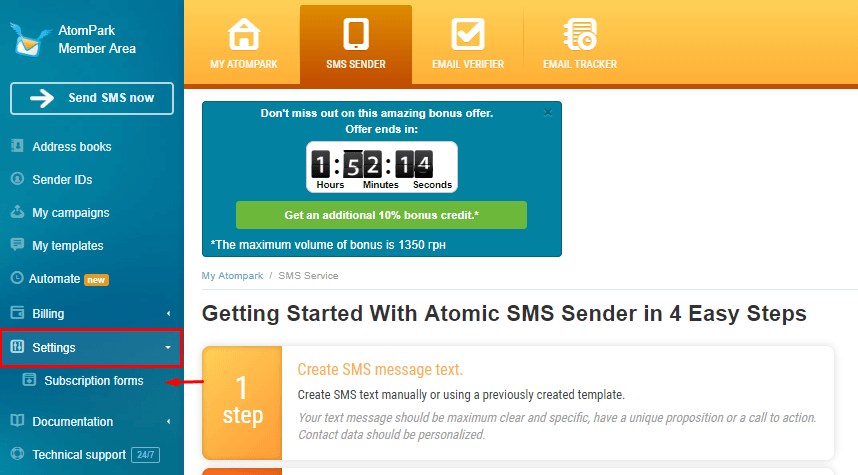
1. Go to the SMS Sender and click “Activate the service” in the bottom part of the webpage:
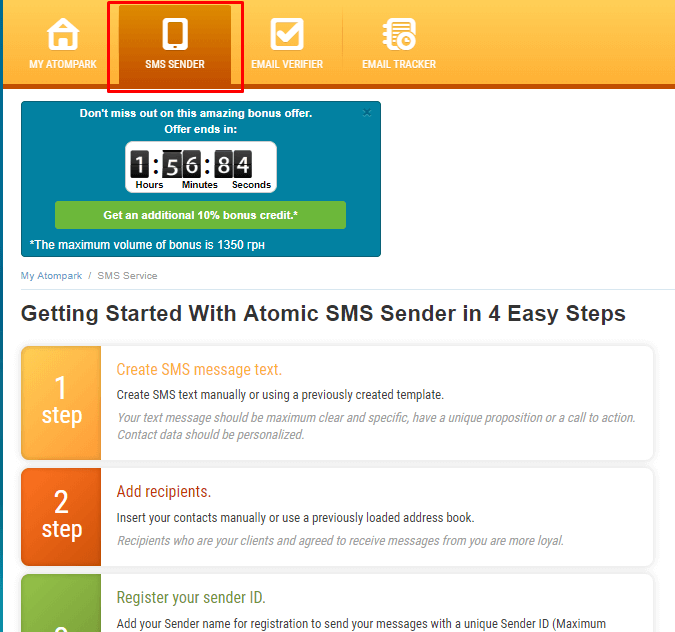
Don't forget to read the info, displayed on the page to understand the algorithms of SMS Sender workflow.
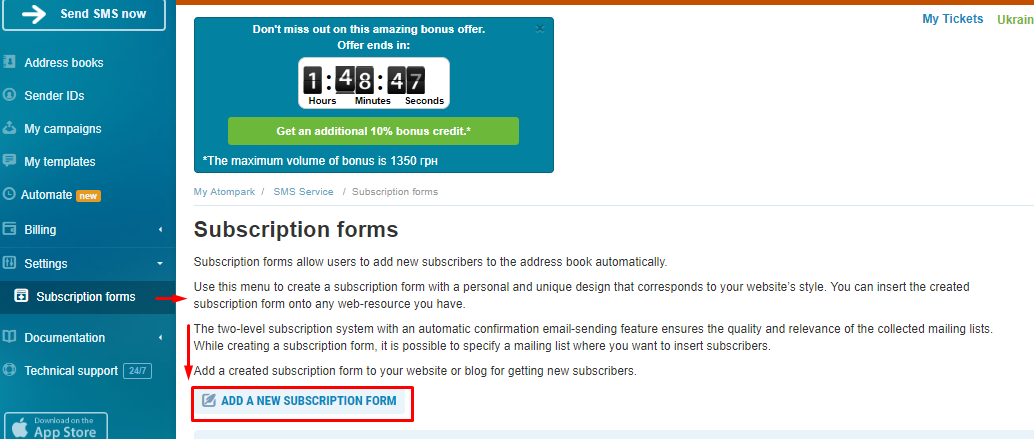
2. On the left sidebar find "Settings" part and choose "Subscription form":
3. On the opened page click “Add a new subscription form”, that will lead you to the “Constructor”:
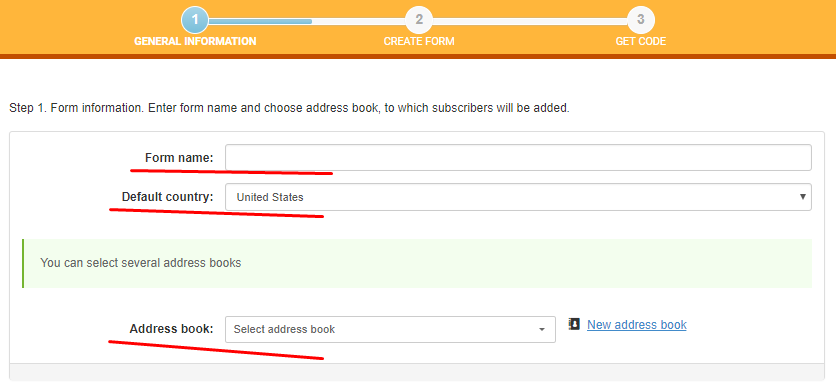
4. Here you need to fill in 3 fields:
5. The form elements construction.
Here you have a list of elements for the future subscription form (on the left side), a preview example of how it will look like (on the right) and the set of text and design functions to configure on the bottom part:
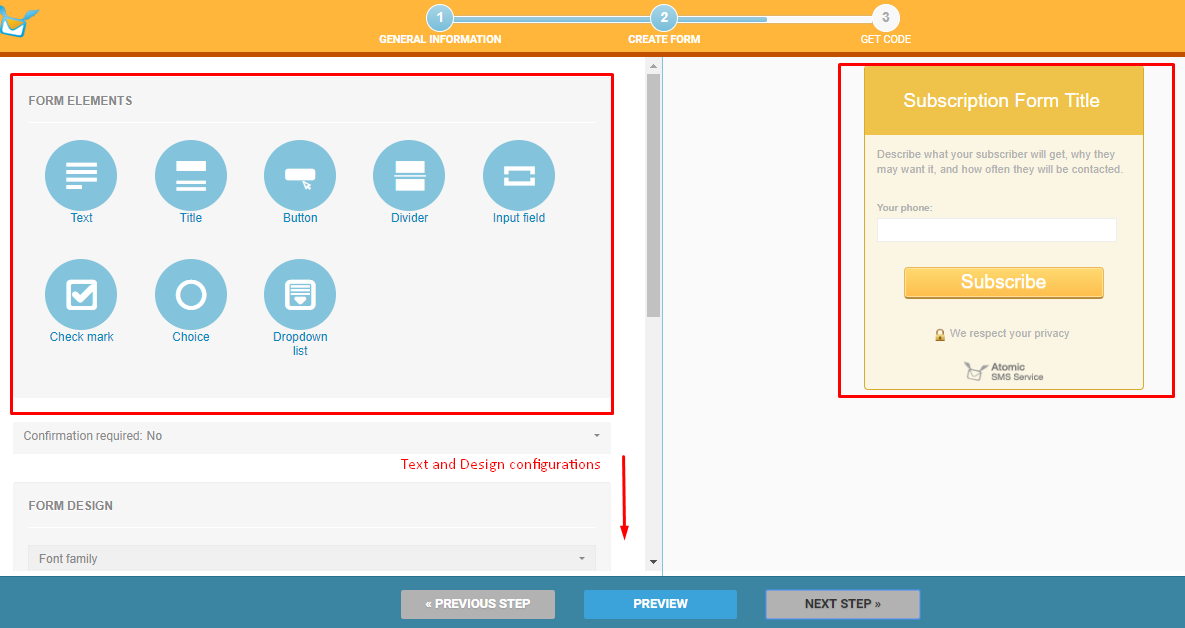
By default, the page contains the basic design of the form. Here we need to add the field of choosing the date of sending text messages.
6. In the element list choose "Input field". Holding it with the mouse, drag the element to the example form on the right side of the page, place it directly under the phone number field:
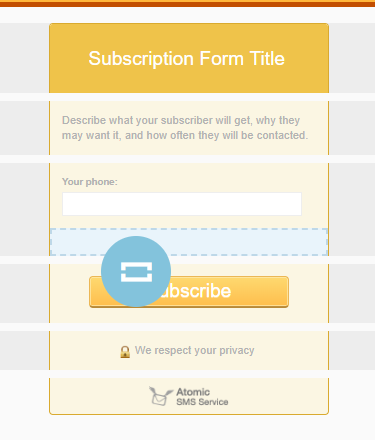
7. Then you'll be able to edit this element, change its form, color, text, etc. There are 5 main parameters to set:
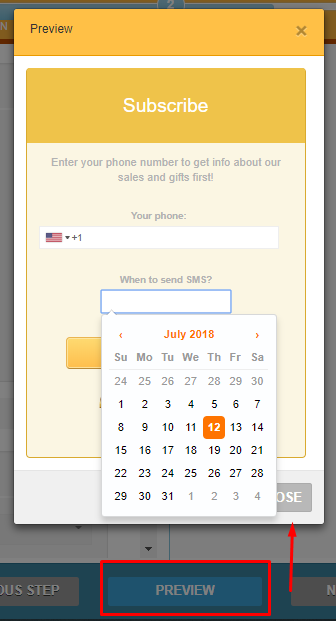
8. Click “Preview” to see the result of your work.
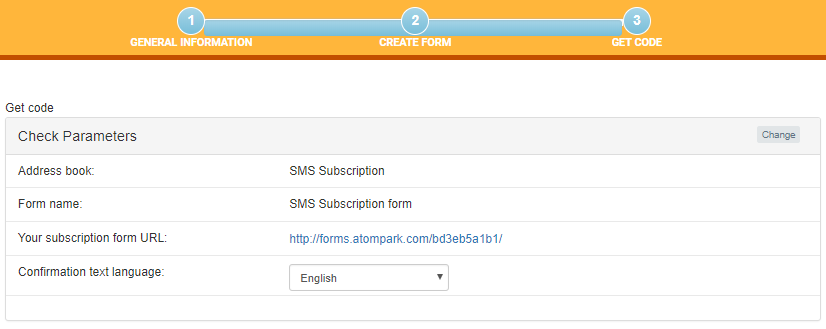
9. The subscription form construction is ready. Press "next step" to check all the parameters of your form and get the code to embed it on your website.
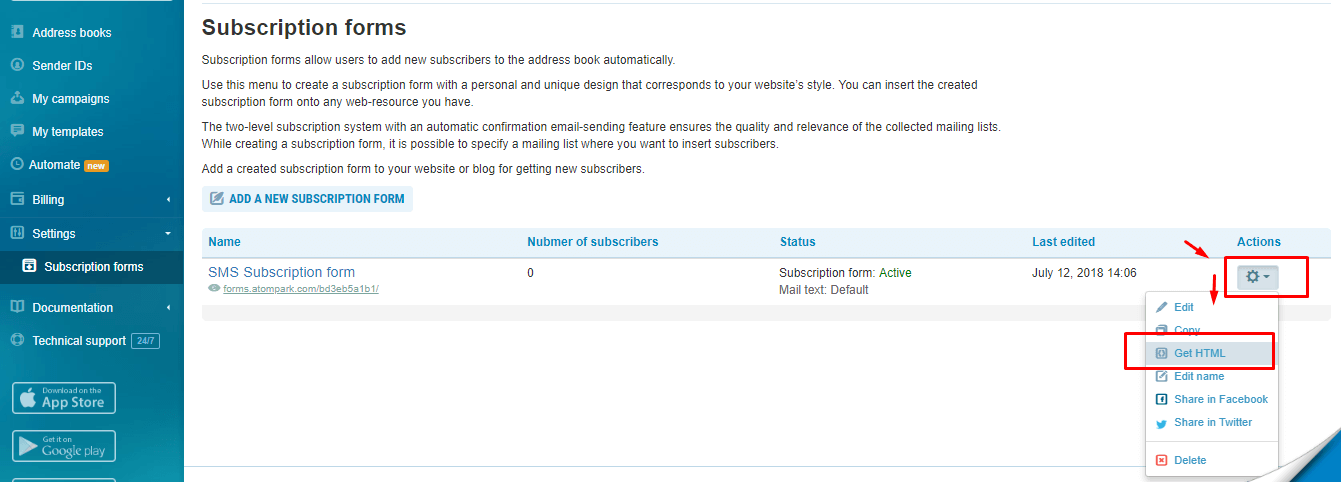
You can also get the HTML code of the form in the main menu, clicking on the “Action” button, then choosing “Get HTML”:
That’s all, insert the code into the website layout and collect numbers.
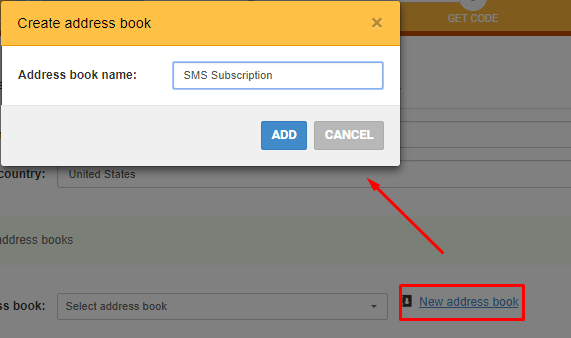
Remember that in the process of setting up the SMS subscription form, we have created a new address book. Numbers of your subscribers will be now added to it.
To activate it and test the form, you need to add at least one number to the list, for example, your own.
For this you have to do next:
1. Go to the left sidebar and click “Address book”.
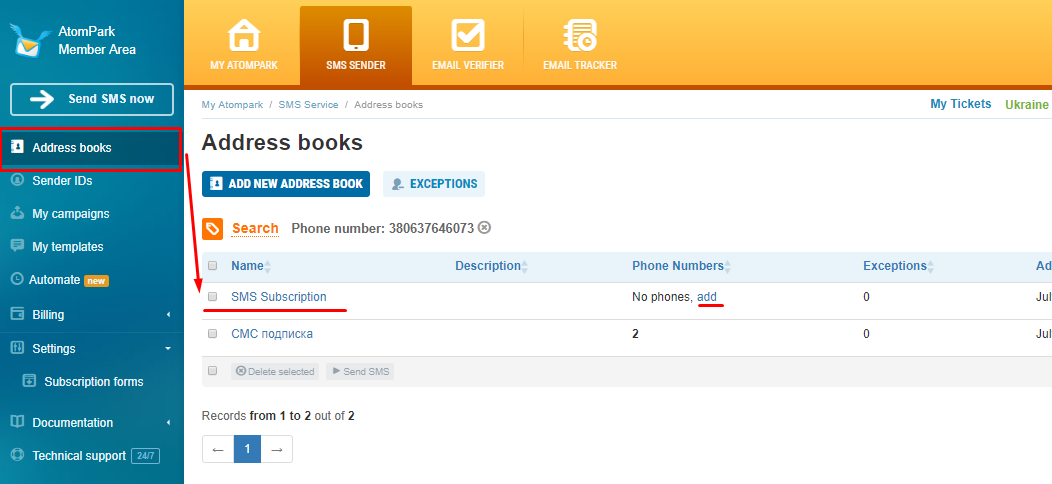
2. In the phone number section choose “Add” and specify your number.
Don’t forget to create a variable (if it does not exist). For this, you should enter variable name and type - DATA.

If you already have an address book, you may copy paste it there from the clipboard or load from the file.
3. Click “Add” and go to the automatization step.
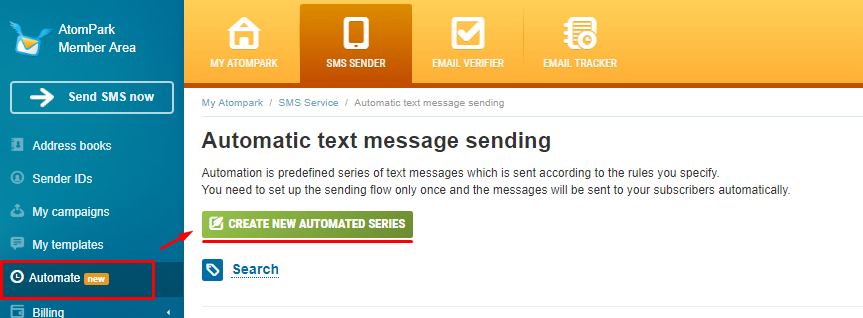
Automate mass text mailing is a sending of text messages without your participation according to the specified rules. You need to set up the sending flow only once and the messages will be sent to your subscribers automatically.
To automate the SMS sending process in Atomic SMS Sender you have to:
1. Go to the relevant sidebar menu section - “Automate” and click “New automated series”
2. There you'll find the next menu:
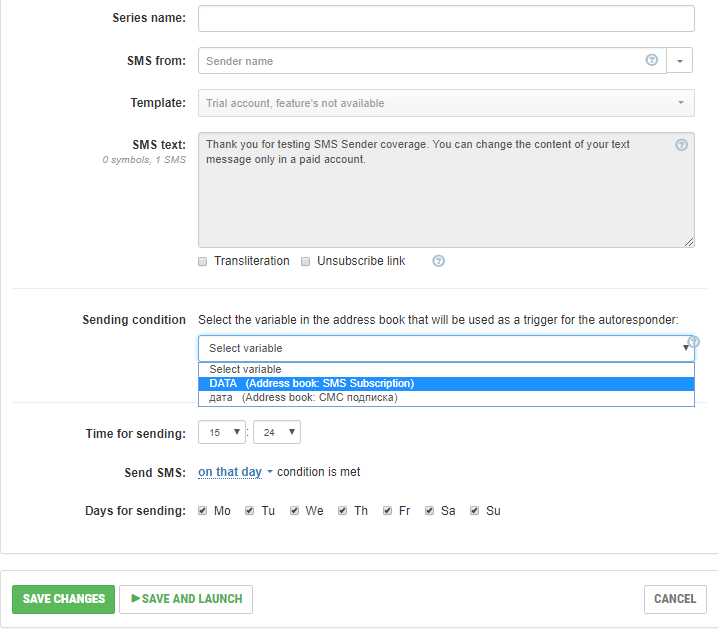
3. Click “Save” and go back to the main menu. Check all the parameters one more time and press “Start”
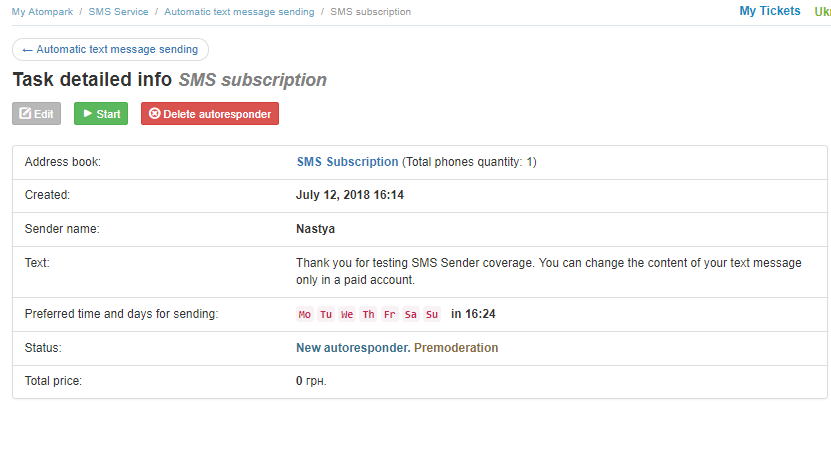
That’s all.
Go to the webpage and test the SMS subscription form. If it works - my congrats, you did it!
Have some questions?
Ask for help the specialists of our 24\7 technical support.
For more information contact our managers:

Top up account and start sending SMS from your Member Area right now
Top up account